
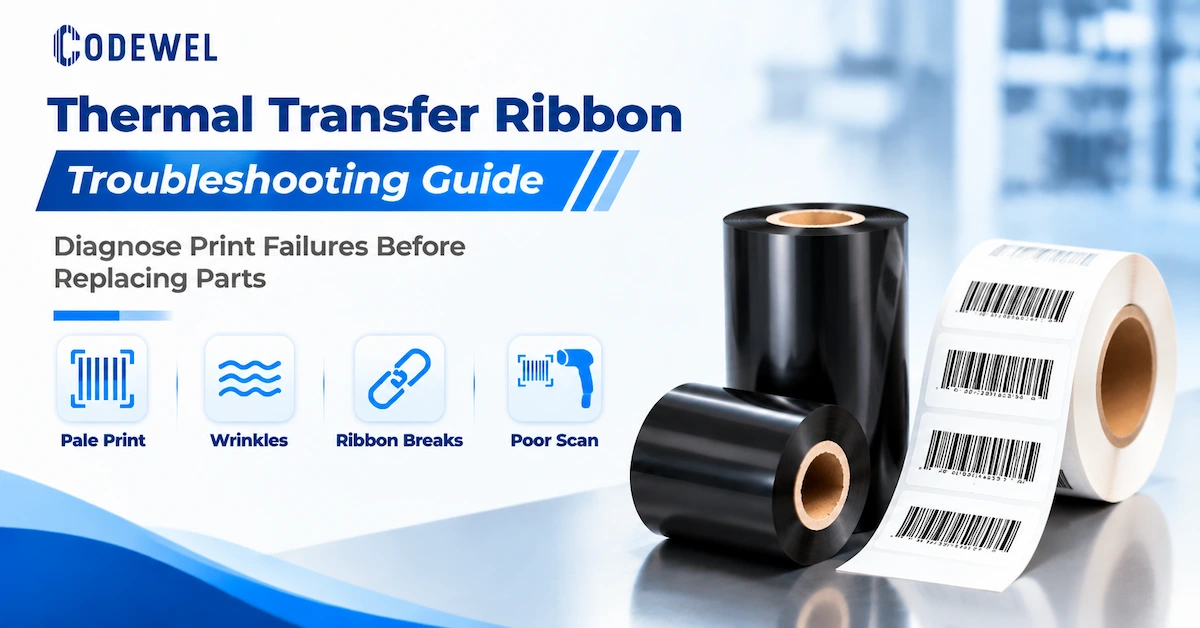
This thermal transfer ribbon troubleshooting guide is for production, warehouse, packaging, maintenance, quality, and procurement teams dealing with pale print, missing image, ribbon wrinkles, breaks, smearing, poor scans, adhesive residue, uneven density, or roll-change defects. The objective is to restore a stable print window that produces readable labels at the required speed and survives the actual application.
Thermal transfer printing is a system: the printer heats the ribbon, the coating releases, and it bonds to the label. Printer, printhead, platen, pressure, ribbon, label face, artwork, speed, energy, storage, and scanner all influence the result. A ribbon can fit the spindle and still be the wrong formulation.
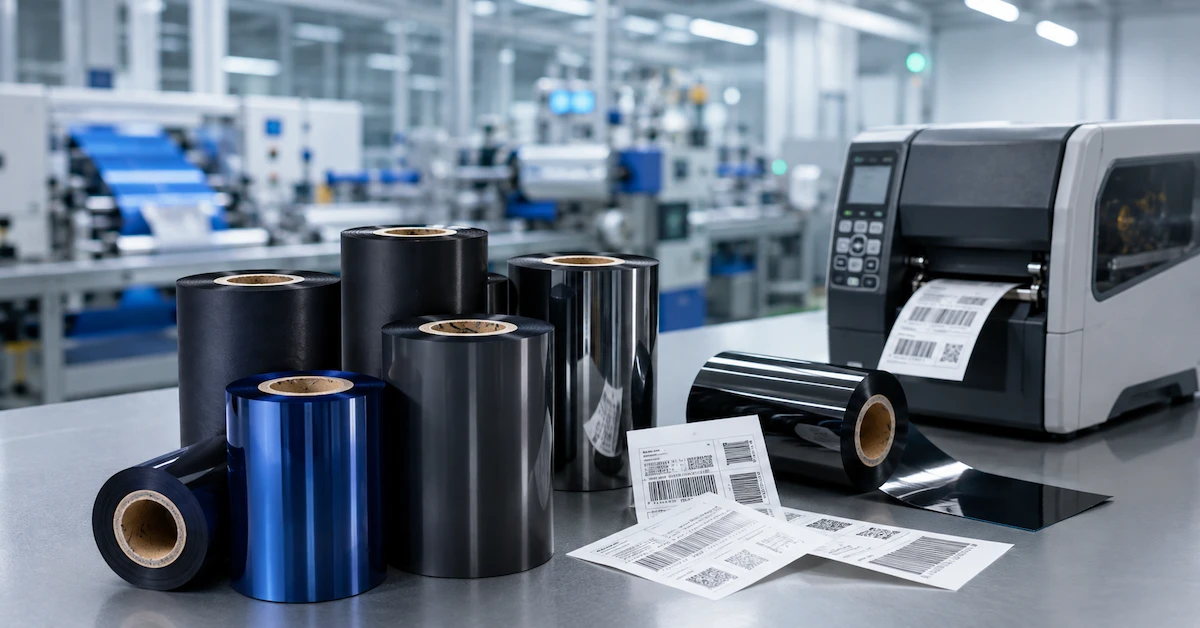
Start with a controlled diagnostic sequence
Random adjustment makes a thermal transfer problem harder to solve. Increasing darkness may hide a dirty printhead while increasing residue and heat load. Changing formulation may improve a smear but leave incorrect pressure or a damaged platen unresolved. First make the problem reproducible and change one variable at a time.
The six checks that prevent unnecessary part replacement
- Confirm the printing method. Verify that the printer is in thermal transfer mode and is designed or configured for a ribbon. Direct thermal mode uses heat-sensitive media and does not use a ribbon.
- Confirm the ribbon path. Check the loading diagram, supply roll, take-up roll, coated side, winding direction, guides, and tension. A ribbon that is reversed or routed incorrectly may produce no image or contaminate the media path.
- Confirm physical compatibility. Record width, length, core, maximum roll diameter, ink side, and label web width. A roll can be the correct length and still be too wide, too large, or wound for a different spindle.
- Clean and inspect the print path. Check the printhead, platen, guides, sensor, label edge, liner, and ribbon for dust, adhesive, coating buildup, cuts, or sharp edges.
- Return to a baseline setting. Use a known artwork, known label, moderate speed, and a controlled darkness or energy setting. Record every change.
- Separate print failure from application failure. Inspect and scan a fresh label, then test it after the required rubbing, heat, moisture, chemical, or storage exposure.
The early checks often explain the failure. If the defect remains after loading, cleaning, and baseline setup, move to material and mechanical diagnosis. If the label fails after use, investigate durability or adhesive specifications.
| Observed problem | First area to check | Do not assume first |
|---|---|---|
| No image or image on the wrong surface | Printer mode, coated side, ribbon path, and take-up operation | That the printhead is defective |
| Light or incomplete image | Cleanliness, speed, energy, pressure, and ribbon/label match | That a stronger ribbon will solve it |
| Wrinkles or diagonal folds | Alignment, tension, guides, roll edge, and pressure balance | That the ribbon material is always the cause |
| Smearing or easy scratching | Label coating, formulation, energy, cooling, and exposure test | That darkness should be increased indefinitely |
| Repeating vertical line | Printhead contamination or damage, platen condition, and ribbon wrinkle | That the artwork has a missing bar |
| Good first scan, later failure | Heat, light, abrasion, chemicals, adhesive, and service-life requirement | That the fresh print proves long-term suitability |
When there is no image or the ribbon does not transfer
A blank label is often a setup problem, not a formulation problem. The fastest field diagnosis is to confirm whether the ribbon coating is facing the label and whether the printhead is applying heat to the correct side. A thermal transfer printer needs the coated side of the ribbon to contact the label through the print zone. If the ribbon is loaded with the carrier side toward the label, the printer may advance normally while producing little or no image.
Check printer mode and ribbon presence
Confirm the printer menu, driver, and media setting. Direct thermal mode is intended for heat-sensitive media and does not require ribbon. Thermal transfer mode expects a ribbon and a compatible label. Some printer families offer both configurations, so the model family alone is not enough. Check the exact installed unit, the ribbon supply and take-up hardware, and the user documentation.
Identify the coated side
If the old roll is available, copy its winding direction and loading route. For a field check, press adhesive tape against each side of a ribbon sample. The side that releases visible ink is the coated side. This is only an orientation aid; the printer manual and roll specification remain the final reference.
Check the take-up roll and tension
A ribbon may appear to load correctly but fail to transfer if the take-up spindle does not grip the leader, if the roll slips, or if the ribbon is not held flat across the printhead. Confirm that the leader is secured, the supply roll rotates freely, the take-up roll winds evenly, and the guides do not pinch one edge. A loose ribbon can create intermittent image loss, while excessive tension can pull the ribbon sideways or cause breaks.
Run a short test with a black rectangle and barcode. If no ink transfers, inspect the printhead connection, pressure, and heat settings according to the printer manufacturer's procedure. Do not work on a powered printhead.
When the print is pale, incomplete, or uneven
Pale output is a transfer problem until proven otherwise. The same symptom can be caused by high speed, a dirty heating line, uneven pressure, an unsuitable coating, a worn platen, incorrect width, or poor storage. Start with controlled checks and change one variable at a time.
Reduce speed before increasing energy
At higher speed, the printhead has less time to transfer the coating. If the bars are incomplete or the image is light, reduce speed while keeping the same label, ribbon, artwork, and printer. If the result improves, the previous process may have been outside the ribbon's stable operating window. Only increase darkness or energy gradually after confirming that the slower setting is acceptable for production.
Clean the printhead and platen
Dust, adhesive, ribbon coating, and label debris can block heat transfer in small areas. A dirty printhead commonly creates a pale vertical line, a repeating void, or a band that remains at the same position on every label. Clean according to the printer manufacturer's instructions with the approved cleaning material and solvent. Codewel product FAQs describe cleaning after each ribbon replacement or at the end of a regular workday, more frequently in high-load use, and immediately when print quality deteriorates. The exact interval should follow the printer instructions and contamination level.
Clean the platen and inspect it for cuts, flattening, adhesive, or embedded debris. A worn platen can reduce contact pressure and create uneven density. Never scrape the printhead, touch the heating line with bare fingers, or restart before it is dry.
Check pressure across the print width
If one side prints darker than the other, compare printhead pressure and alignment. The label and ribbon should track straight through the print zone. Excess pressure on one side can increase local wear, while insufficient pressure can leave incomplete transfer. Do not compensate by increasing energy across the full label because that may overheat the darker side and increase ribbon residue.
Check label surface and ribbon formulation
Ribbon coating must release from the carrier and bond to the label face. Uncoated paper, coated paper, matte synthetic, glossy synthetic, textile, and packaging film can have very different surface behavior. If a known-clean printer produces pale output on one label but acceptable output on another, the label surface or ribbon match becomes a leading suspect.
Codewel's published CW502 wax ribbon lists a 70 C ink melting point, color density of at least 2.1, a listed 0-6 IPS speed range, and common 1/2-inch or 1-inch core options. These fields provide a starting reference for general paper-label testing. They do not prove that every paper coating will transfer at the same setting.
For coated paper or greater routine handling resistance, the published CW630 premium wax-resin ribbon lists a 72 C ink melting point, a listed 0-10 IPS speed range, 90 C heat resistance, 95 scratch resistance, and 60 solvent resistance. For synthetic or demanding chemical-label trials, the published CW730 premium resin ribbon lists a 95 C ink melting point, a listed 0-8 IPS speed range, 200 C heat resistance, and scratch resistance of 100. Use these products as candidates for controlled samples, not as automatic answers to a pale-print problem.
When the ribbon wrinkles, folds, or tracks sideways
Ribbon wrinkles usually indicate that the ribbon is not travelling flat through the print zone. The cause may be the supply roll, guide, printhead edge, platen, or take-up spindle. A wrinkle can create a light diagonal band, contaminate the printhead, or lead to a break.
Reload before changing the formulation
Stop the printer and reload the ribbon from the beginning. Confirm that the supply and take-up rolls are parallel, the leader is attached straight, the ribbon passes under or over each guide as shown in the manual, and the coated side is oriented correctly. Remove slack without stretching the film. Advance a short length at low speed and watch whether the ribbon remains flat.
Verify width, edge quality, and roll condition
A ribbon that is too narrow may leave part of the liner exposed to the printhead. A ribbon that is much wider than necessary can increase tracking sensitivity and waste material. The roll edge should be clean and not telescoped, crushed, split, or contaminated. A damaged edge can start a wrinkle that repeats through the roll.
Compare the ribbon width with the full label web and liner width, not just the visible label face. Record the core and maximum roll diameter as well. A correct width with the wrong core or outside diameter can still create tension and spindle problems.
Check pressure, guides, and platen
Uneven pressure can push the ribbon toward one side. A guide that is too tight can create edge friction. A worn platen can change the contact angle. Inspect these mechanical points before replacing a good ribbon with a more expensive grade. If wrinkles appear only at high speed, compare a slower run and check whether tension control is stable.
| Wrinkle pattern | Likely cause | Diagnostic action |
|---|---|---|
| Diagonal wrinkle from one edge | Skewed roll, guide pressure, uneven spindle seating, or misalignment | Reload both rolls, set guides evenly, and check parallel alignment. |
| Wrinkle starts after a roll change | Leader attached at an angle, damaged roll edge, or different core | Compare the new roll geometry with the approved specification. |
| Wrinkle only at high speed | Tension control, excessive energy, or unstable take-up | Reduce speed, confirm energy, and observe supply/take-up rotation. |
| Wrinkle repeats at one label position | Platen damage, printhead pressure, guide, or liner defect | Map the defect position and inspect the matching path component. |
| Ribbon folds at the printhead edge | Ribbon too narrow, pressure imbalance, or edge interference | Verify web coverage and pressure before changing formulation. |
When the ribbon breaks or sticks to the label
A ribbon break stops production and can leave coating on the printhead. Common causes include excessive energy, a sharp label or liner edge, a damaged ribbon, excessive tension, incorrect threading, a take-up problem, or an unstable operating range. Treat a break as both mechanical and thermal.
Reduce heat and inspect the path
Return to a moderate darkness or energy setting and reduce speed only if the image becomes incomplete. Inspect the ribbon for a straight tear, melted patch, edge cut, or brittle section. Check whether the break occurs at the same position, after a particular label gap, or at the start of a new roll. A repeated position points toward a path or label defect; a random section may point toward roll damage or tension variation.
Check sharp edges and exposed liner
Die-cut label edges, a damaged liner, a bent guide, or an exposed adhesive edge can cut the ribbon. Verify that the ribbon is wide enough to cover the media and that the label web is tracking correctly. Clean any residue before loading a new roll. If a new ribbon breaks in the same place, do not continue replacing rolls without inspecting the printer path.
Separate sticking from poor bonding
If the ribbon sticks to the label or leaves a heavy deposit, energy may be too high, the label coating may be unsuitable, or the ribbon may require a different operating window. If the printed image scratches off easily, the opposite problem may be present: insufficient bonding, a formulation mismatch, or an exposure beyond the product's intended application. Use a controlled sample matrix rather than treating every sticking or scratching symptom as a reason to increase or decrease darkness.
When the image smears, scratches, or fades after printing
Smearing moves or spreads the image during handling; scratching removes part of it after contact. Both may reflect a ribbon and label mismatch, excessive energy, an incompatible topcoat, early handling, or chemical exposure beyond the construction's capability.
Start with the label, not only the ribbon
Labels described as “coated paper” may have different topcoats. Synthetic films with the same base polymer may also differ in surface treatment. Obtain the exact material code and test the production label when possible. Approval must include the actual label face and adhesive.
Use the least aggressive formulation that passes
Wax is commonly evaluated for ordinary paper labels, wax-resin for coated paper or moderate handling, and resin for qualified synthetic labels or demanding resistance. The strongest formulation is not automatically best because it may require more energy, cost more, or perform poorly on an unsuitable topcoat.
Codewel's published product pages describe CW630 for premium wax-resin testing and CW730 for premium resin testing. Use their published values for comparison, then design rub, solvent, heat, or storage tests around the actual application.
Test after the real dwell time
Define when the rub or chemical test begins because labels may cool, stack, or remain in storage before the next operation. Test fresh and conditioned labels. If the image fades after storage, investigate media, ribbon, light, heat, and exposure rather than simply changing darkness.
When barcodes look good but do not scan
A visual image and a scannable barcode are not identical. A barcode can appear dark while bars are too wide, spaces are filled, the quiet zone is missing, module size is too small, or data is incorrect. Separate data, print geometry, and scanner conditions.
Check data and artwork
- Compare the encoded value with the human-readable text and the source record.
- Check leading zeros, check digits, date conversion, spaces, truncation, and variable-field mapping.
- Protect the quiet zone from borders, text, graphics, folds, seams, and label edges.
- Confirm that the barcode was not stretched or compressed without recalculating module width.
- Print the smallest symbol and the densest artwork expected in production.
Check resolution, speed, and energy together
203 DPI can be suitable for many larger logistics and shipping symbols. 300 DPI may be more appropriate for smaller text or denser codes. 600 DPI may be needed for very fine graphics or micro-identification. Higher resolution does not correct bad artwork, a contaminated printhead, a poor ribbon match, or a missing quiet zone. Use the actual printer, artwork, and scanner during approval.
Excess energy can make bars spread and close narrow spaces. Too little energy can create voids and weak contrast. High speed can reduce transfer time. Build a small speed and energy matrix, change one variable at a time, and record scan results along with visual observations. The acceptable setting is the lowest stable point that passes the defined scan requirement with operating margin.
Check scanner position and lighting
Scan the label from the actual distance and angle used downstream. Test the left, center, and right sides of the web to expose pressure or alignment variation. If only one scanner fails, compare the scanner, illumination, focus, and configuration before changing the ribbon. If multiple scanners fail on the same symbol, return to data and print geometry.
When problems appear after changing the ribbon or label roll
A roll change can reveal which variable moved. Compare the new roll with the approved specification rather than relying on the product name. Check material family, width, length, core, outside diameter, ink side, winding, batch, storage, and label face. A similar-looking roll may have a different coating or operating window.
Use a change-control record
For repeat orders, record the approved ribbon code, formulation, width, length, core, winding, label stock, printer, DPI, speed, energy, artwork, scanner, and test result. When print quality changes after a new delivery, compare those fields line by line. If a supplier proposes a substitution, request a new sample and document whether the change affects contrast, edge definition, resistance, residue, or printhead cleaning frequency.
Check storage and conditioning
Ribbon and label materials should be stored according to their product instructions and protected from excessive heat, moisture, dust, and direct sunlight. Codewel product records publish usage and storage ranges for individual ribbon families. Use the current product record for the exact SKU. A roll stored in a hot vehicle, damp warehouse, or open production area may not behave like a controlled sample even when the printed dimensions are identical.
A practical troubleshooting matrix
| Symptom | Likely causes | Check first | Corrective test |
|---|---|---|---|
| No image | Direct thermal mode, wrong coated side, incorrect route, no take-up grip | Mode, tape check, loading diagram, leader attachment | Reload and print a simple test block at baseline settings. |
| Light print | Low energy, high speed, dirty printhead, low pressure, label mismatch | Cleanliness, speed, pressure, label and ribbon specification | Use a fixed label and test slower speed before increasing energy. |
| Uneven darkness | Pressure imbalance, platen wear, alignment, contamination | Full-width diagnostic pattern and repeating position | Balance pressure, clean, inspect platen, then compare a known roll. |
| Ribbon wrinkle | Skewed roll, guide friction, tension, wrong width, damaged edge | Supply/take-up parallelism and roll edges | Reload, verify dimensions, and run slowly while observing tracking. |
| Ribbon break | High energy, sharp edge, excess tension, damaged roll, path fault | Tear position and path components | Reduce energy, inspect edges, and compare a controlled roll. |
| Smear or scratch | Formulation mismatch, topcoat, excessive heat, chemical exposure | Actual label code and exposure method | Compare wax-resin or resin on the real label after the required dwell. |
| Vertical line or void | Printhead contamination/damage, platen defect, wrinkle | Whether the line repeats at the same position | Clean and inspect before ordering a replacement printhead. |
| Barcode fails later | Exposure exceeds image or adhesive capability | Service route, heat, light, rub, chemical, and storage | Repeat the exposure and evaluate label plus ribbon as one system. |
How to run a repeatable sample and acceptance test
A sample should answer a production question. “Does it print?” is too weak. Test whether the actual printer, printhead, label, ribbon, artwork, scanner, speed, and environment meet the acceptance rule. Keep the test simple enough to repeat.
Record the setup
- Printer brand, exact model, configuration, DPI, firmware or driver context where relevant.
- Printhead and platen condition, cleaning date, pressure setting, speed, and darkness or energy.
- Label supplier, exact face stock, adhesive, liner, dimensions, batch, and roll direction.
- Ribbon formulation, product code, width, length, core, winding, ink side, and batch or sample reference.
- Barcode symbology, smallest module, human-readable fields, graphics, and data source.
- Scanner or verifier, distance, angle, lighting, and pass/fail rule.
- Environmental exposure, dwell time, rub method, chemicals, temperature, moisture, or storage period.
Test normal and boundary conditions
Print normal and difficult approved artwork, including the smallest symbol, densest data, longest text, rotated code, solid blocks, and fine lines. Run normal and peak speed. Test across the label width and a representative batch rather than one center label.
After printing, inspect and scan immediately, then apply the required exposure. Evaluate image, barcode, adhesion, smear, scratch, residue, and reprint rate. Retain control samples and the test record so future changes can be compared against evidence.
What information to send in a technical RFQ
A complete RFQ lets a supplier diagnose before quoting and prevents a technically compatible roll from failing the application. Include:
| RFQ field | Example information to provide | Why it matters |
|---|---|---|
| Printer | Brand, exact model, configuration, DPI, print width, thermal transfer capability | Determines loading format, resolution, and maximum roll geometry. |
| Ribbon | Wax, wax-resin, resin, TTO, or wash-care; width, length, core, ink side, winding | Determines transfer, tension, yield, and physical fit. |
| Label | Face material, topcoat, adhesive, liner width, size, roll direction, batch | Determines bonding and print quality. |
| Artwork | Barcode type, module size, text, graphics, variable data, label file or sample | Determines DPI, speed, and scan margin. |
| Exposure | Rub, water, alcohol, oil, solvent, heat, light, freezer, washing, storage | Determines durability and formulation starting point. |
| Volume | Labels per day, shifts, peak rate, monthly or annual demand | Determines roll length, changeover impact, and printer duty cycle. |
| Commercial | Destination, packaging, private label, sample quantity, target date | Allows current MOQ, lead time, packaging, and quotation confirmation. |
Ask the supplier to identify the proposed formulation and starting settings with the sample. If it recommends changing the label, printer, printhead, or energy range, ask which failure mode the change is intended to correct.
Manufacturer evidence and maintenance boundaries
Hangzhou Codewel New Materials Co., Ltd. identifies itself on its public company pages as a Hangzhou, China company integrating R&D, production, and marketing. The published profile lists thermal transfer ribbons, barcode labels, thermal transfer printers, printheads, barcode scanners, and related products. It also states that the company has more than 10 coating and cutting lines, a production base exceeding 6,000 square meters, annual output above 100 million square meters, and exports to more than 100 countries.
These facts clarify the manufacturer entity, location, product scope, production context, and market reach. They do not replace model-specific troubleshooting, which depends on the exact printer, label, ribbon, settings, exposure, and scan requirement. Use the Codewel About page for context and the contact page for a technical specification or sample request.
Codewel's published product pages can support a first sample shortlist, including wax, wax-resin, and resin formulations. Current stock, pricing, MOQ, lead time, sample policy, packaging, warranty, and order-level performance should be confirmed in the current quotation. For a recurring program, request lot identification, retained samples, change notification, and a documented approved configuration.
Frequently asked questions
Why is my thermal transfer ribbon printing blank?
Check thermal transfer mode, coated-side orientation, ribbon routing, take-up grip, printhead contact, and energy. A blank result is often a mode or loading problem before it is a chemistry problem.
Why is my thermal transfer print too light?
Possible causes include high speed, low energy, contamination, uneven pressure, a worn platen, or a poor ribbon and label match. Clean and inspect first, then test slower speed. Increase energy only after mechanical and material checks.
Why does my thermal transfer ribbon wrinkle?
Wrinkles commonly result from skewed rolls, uneven tension, incorrect loading, guide friction, pressure imbalance, an incorrect width or core, or a damaged ribbon edge. Reload the roll, check parallel alignment and guides, verify the roll geometry, and observe tracking at low speed before changing formulation.
Why does the ribbon keep breaking?
Check excessive darkness or energy, sharp label or liner edges, damaged ribbon, excessive tension, take-up operation, and the path around the printhead. Inspect where the break occurs. A repeated position suggests a printer or media-path issue; a random tear may point toward roll damage or tension variation.
Why does the printed barcode look good but fail to scan?
Check the encoded data, quiet zone, module size, bar growth, speed, energy, scanner distance, lighting, and resolution. Scan the smallest and densest production artwork with the actual downstream scanner. A visual inspection alone cannot confirm barcode performance.
Should I increase darkness when the label is pale?
Not immediately. First check the printhead, platen, pressure, ribbon path, speed, label surface, and formulation. Excessive darkness can create bar growth, smear, ribbon sticking, residue, and unnecessary printhead load. Use the lowest stable energy that passes the acceptance test.
Should I change from wax to resin when the ribbon smears?
Wax-resin or resin may be appropriate when the label surface and exposure require greater resistance, but changing formulation is not the only possible correction. Check energy, speed, topcoat, dwell time, and chemical exposure first. Test the proposed ribbon on the actual label before bulk ordering.
How often should I clean the thermal printhead?
Follow the printer manufacturer's instructions and the contamination level of the line. Codewel product FAQs describe cleaning after each ribbon replacement or at the end of a regular workday, with more frequent cleaning for high-load use and immediate cleaning when print quality deteriorates. Record the cleaning interval and adjust it from real failure evidence.
Can a wider ribbon fix poor print quality?
A ribbon should normally cover the complete media and liner width while staying within the printer's limit. An unsuitable width can expose the printhead or create tracking problems, but a wider roll does not fix dirty components, poor pressure, wrong energy, bad artwork, or an incompatible label coating. Verify the full web width and printer specification.
What should I send when requesting troubleshooting support?
Send the exact printer model and DPI, photo of the loaded ribbon path, ribbon width, length, core, winding, label material and liner width, artwork or barcode sample, speed, darkness, defect photo, daily volume, and exposure requirements. A physical label sample and the failed ribbon or roll details make diagnosis more reliable.
Conclusion
Thermal transfer ribbon troubleshooting works best as a controlled diagnosis, not a sequence of random setting changes. Confirm the printer mode and coated side, verify the roll geometry and winding, reload the ribbon, clean the print path, inspect pressure and platen condition, return to a baseline speed and energy, and then test the ribbon against the actual label and exposure. Use the symptom pattern to decide whether the next step belongs to setup, mechanics, formulation, artwork, scanner conditions, or the application specification.
A reliable production result is the combination that prints, scans, remains attached, and survives the required service life at a repeatable cost. Codewel's wax, wax-resin, resin, printer, printhead, label, and scanner product areas provide starting points for a technical evaluation. Send the exact printer, label, ribbon dimensions, artwork, defect, and acceptance requirement before requesting a replacement or bulk quote.